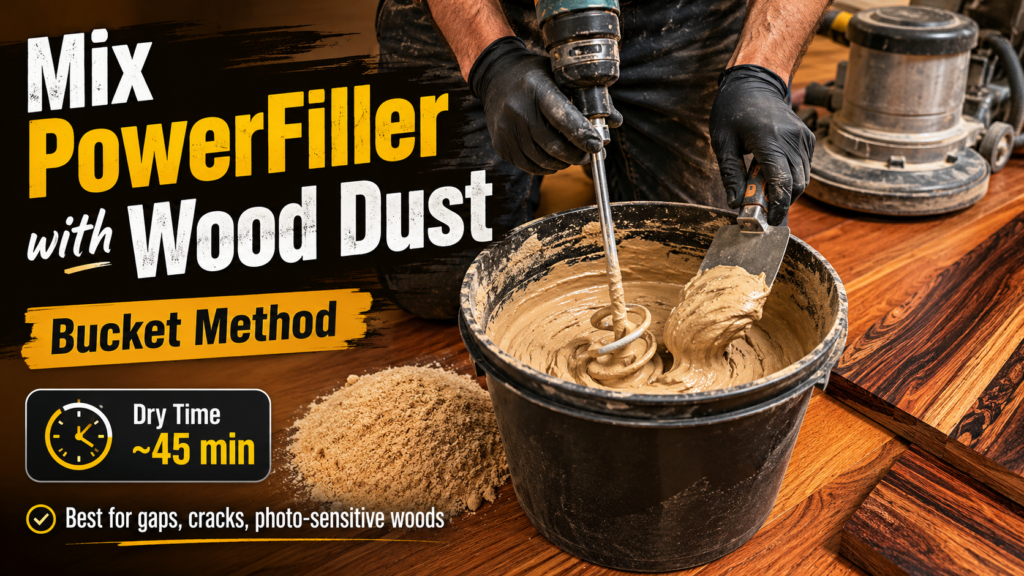
When you’re filling gaps, cracks, and fine surface imperfections in a hardwood floor, the filler you choose matters. The method matters just as much.
In this video, we’re using Berger-Seidle Power Filler, a mixable wood filler sold under the AquaChoice label here in North America. Internationally, this product is known as Pafuki.
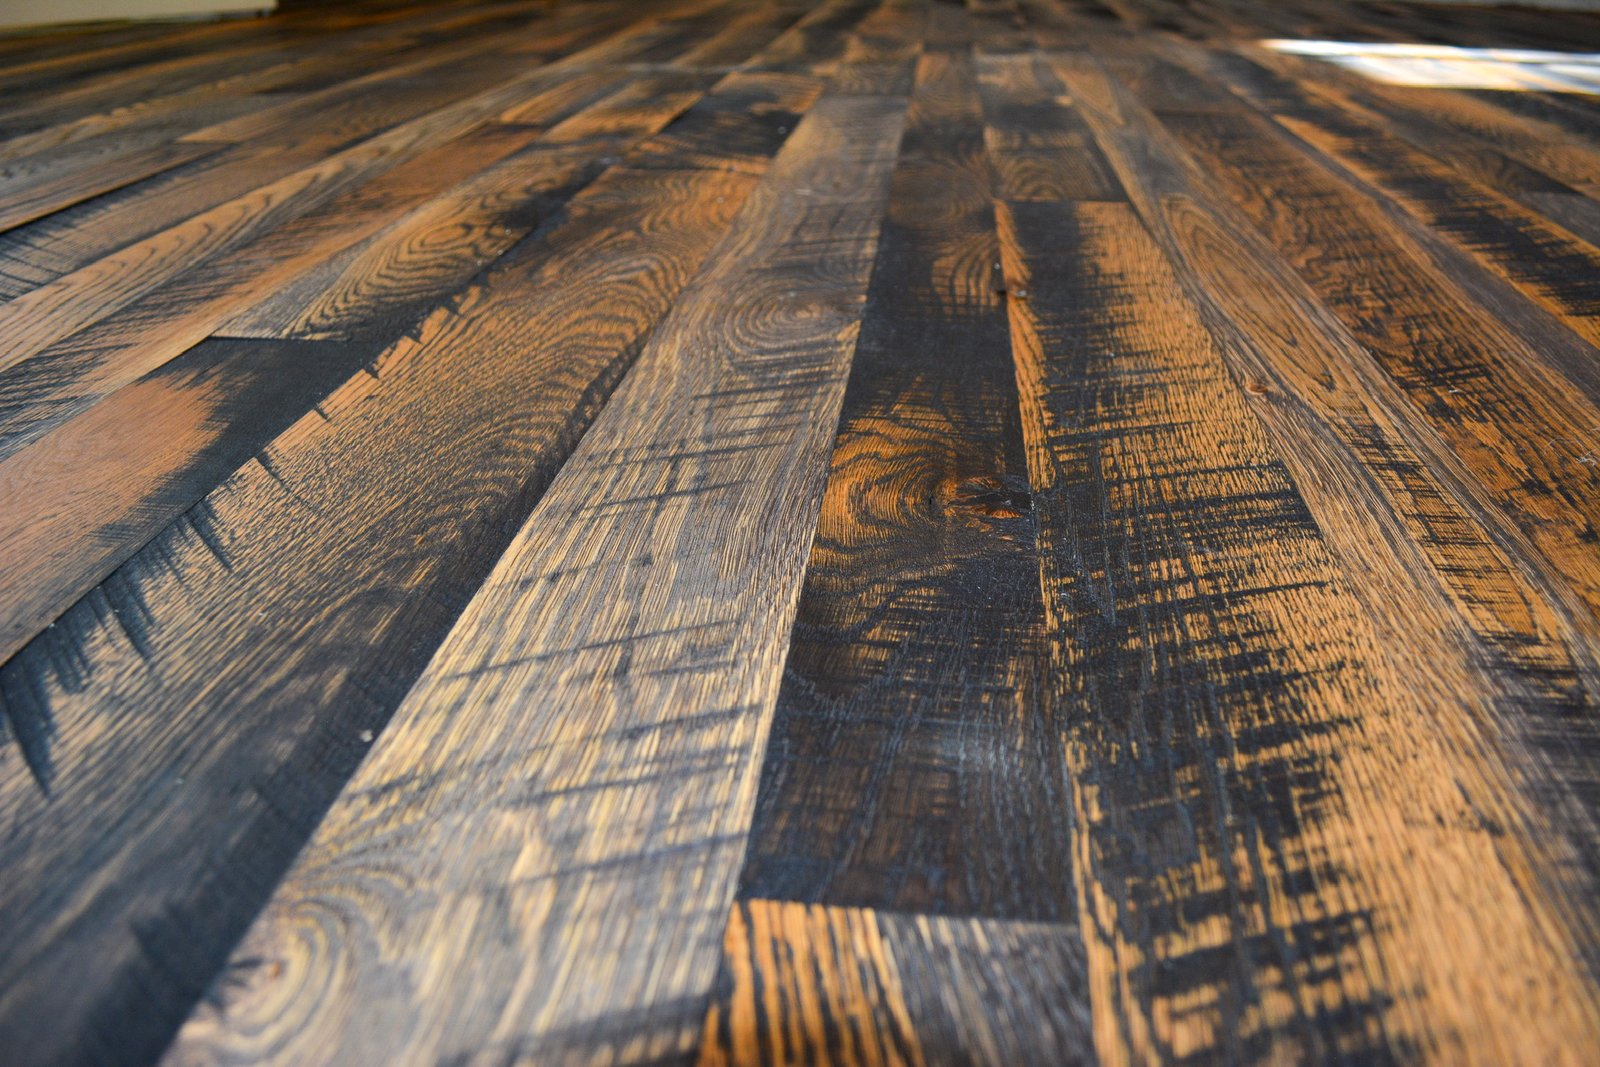
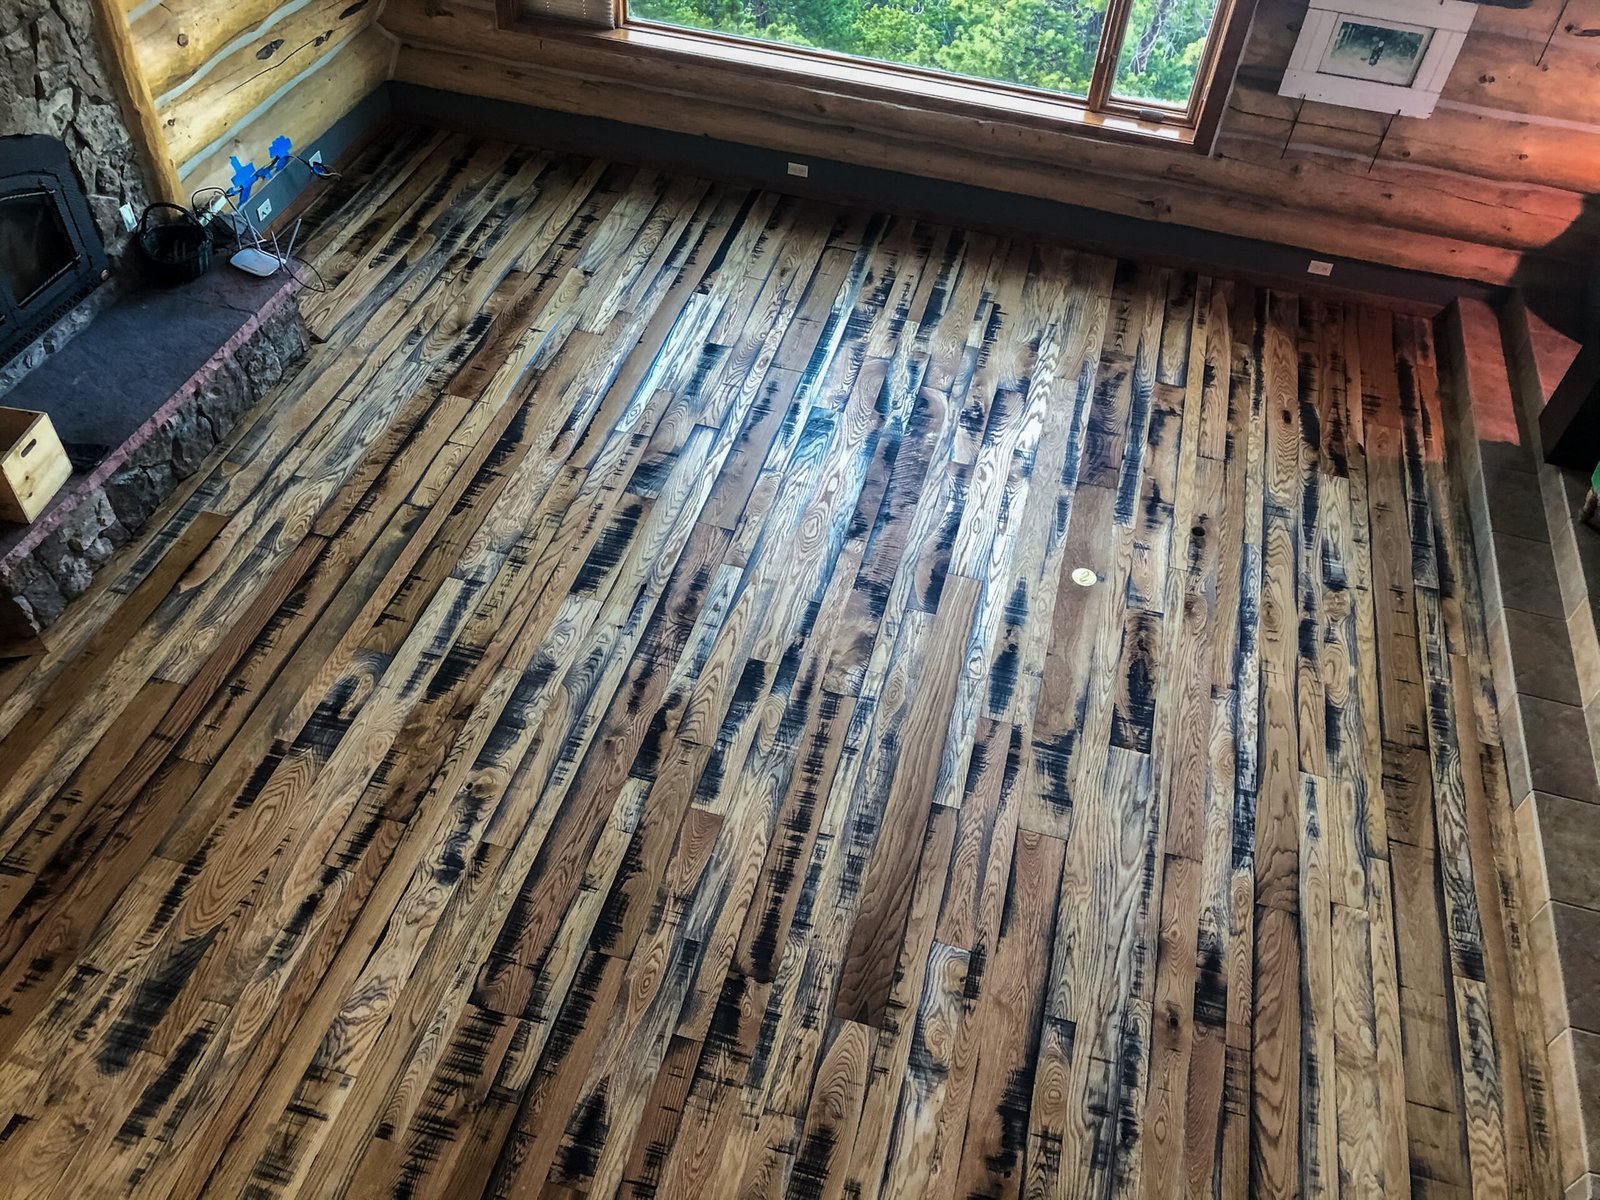
The idea is simple. Instead of using a pre-colored filler that might look close today and wrong tomorrow, Power Filler is mixed with fine wood dust from the actual floor. That gives you a better color match, a cleaner bond, and a filler that ages more naturally with the wood.
For sensitive species, exotic floors, and photosensitive woods, that can make a big difference.
What Is Berger-Seidle Power Filler?
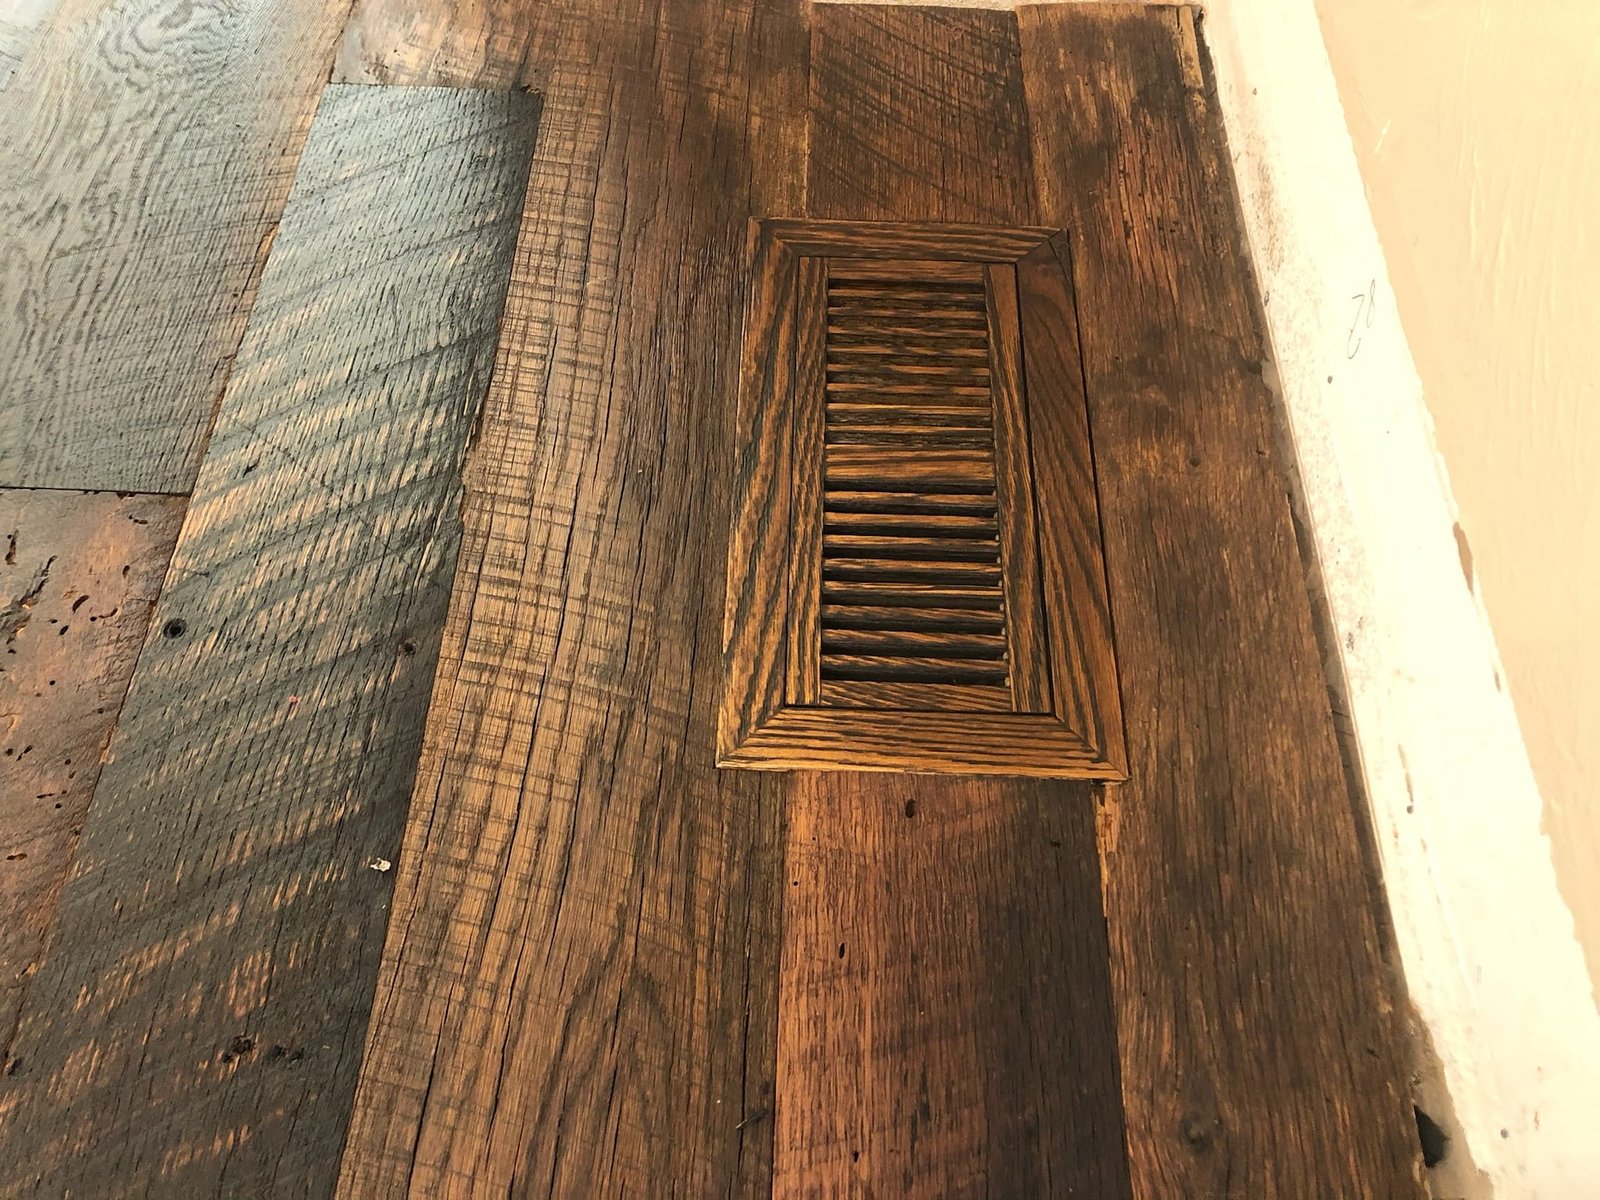
Berger-Seidle Power Filler is a flexible, sandable filler designed for hardwood flooring work. It is made to be mixed with sanding dust, then troweled across the floor to fill cracks, seams, nail holes, and smaller surface voids.
Because the filler is mixed with dust from the floor itself, it blends into the wood more naturally than many off-the-shelf fillers.
That is especially useful for:
- Gaps between boards
- Small cracks
- Fine surface imperfections
- Photosensitive wood species
- Exotic hardwood floors
- Floors where color match is critical
The filler can also be adjusted depending on the job. Mix it thicker for deeper cracks. Mix it thinner for fine surface work and wider trowel spreading.
Why Use Wood Dust in Floor Filler?
Wood dust gives the filler its body and color. For the best results, use fine dust from a planetary sander or edger, ideally 80 grit or finer. Coarse dust can leave the filler rough, chunky, or harder to spread. Fine dust gives you a smoother paste and helps the filler settle into gaps more cleanly. The better the dust, the better the filler.
Dust from the actual floor also gives you a more natural look after sanding and finishing. Since the filler contains material from the floor itself, it has a better chance of aging with the wood instead of standing out later. That matters on floors where the color shifts over time, especially photosensitive species.
The Bucket Mix Method
The bucket mix method is exactly what it sounds like. You mix the filler liquid and wood dust in a clean bucket until you get a smooth, workable paste. Here’s the basic process.
1. Start With a Clean Bucket
Use a clean bucket so you are not dragging dirt, old finish, dried filler, or random grit into the mix. Anything that gets into the bucket can end up in the filler, and eventually, on the floor.
2. Add Fine Wood Dust
Use clean sanding dust from the floor. Dust from a planetary machine or edger works well, especially when it is 80 grit or finer. Avoid contaminated dust. You do not want finish residue, debris, or dust from mixed materials in your filler.
3. Add Power Filler Liquid
Pour the Power Filler liquid into the bucket with the dust. The exact feel of the mix will depend on the job. For deeper cracks, keep the mix thicker. For fine surface filling, keep it creamier and easier to spread.
4. Mix Slowly With a Paddle Bit
Use a paddle bit on a drill and start slow. This is not a race. Mixing too aggressively can make a mess and can also make it harder to control the consistency. Work the mixture until it becomes smooth and lump-free. Scrape the sides of the bucket as you go so dry dust does not sit along the edges.
5. Check the Consistency
The goal is a creamy, workable paste. It should spread well with a trowel, but still have enough body to fill gaps and cracks. If it is too thin, add more fine dust. If it is too thick, add a little more filler liquid. Small adjustments are better than overcorrecting and turning the bucket into soup.
Applying the Filler
Once the filler is mixed, it is ready to apply. A European-style trowel works well for this step because it helps push the filler deep into the gaps while leaving a thin, even layer across the surface. Work the filler into the floor, not just over the top of it. The goal is to pack the gaps and cracks, then leave the surface clean enough that sanding does not become a fight later.
Take your time here. Good filling work saves time during sanding and finishing.
How Long Does Power Filler Take to Dry?
Dry time is usually around 45 minutes, depending on jobsite conditions. Temperature, humidity, airflow, filler thickness, and the size of the gaps can all affect drying time. Once the filler is dry, it can be sanded off. A planetary sander usually gives the cleanest result because it levels the filler smoothly without being too aggressive in one direction.
Touch-Up Before Final Sanding
Some floors need a second pass. After the first sanding, you may notice a few spots that need touch-up filler. That is normal, especially on floors with deeper cracks or irregular gaps. Do the touch-up pass before final sanding. That gives everything a chance to blend cleanly before the floor is finished. Skipping that step can leave small imperfections that become much more obvious once finish hits the floor.
When This Filler Method Works Best
This method is a strong choice when the floor needs a filler that blends with the wood instead of fighting against it.
It works especially well for:
- Hardwood floor gaps
- Small cracks
- Exotic wood floors
- Photosensitive species
- Fine surface imperfections
- Floors where natural aging matters
- Jobs where color match is important
It is not magic in a bucket. No filler is. Large movement gaps, structural issues, or unstable flooring still need to be addressed the right way. But when the floor is ready for filler, Berger-Seidle Power Filler mixed with fine wood dust is a clean, professional option.
Final Thoughts
The bucket mix method gives you control. You can adjust the filler based on the floor, the gaps, the dust, and the finish plan. Use clean dust. Mix slowly. Scrape the bucket. Aim for a smooth paste. Trowel it tight. Let it dry. Sand it clean. That is the process.
For hardwood floors with sensitive species, exotic woods, or color-match concerns, this method helps the filler look like it belongs there, not like it got invited last minute and wore the wrong outfit. Have questions about wood filler, sanding, or hardwood floor finishing? Drop them in the comments on the video, or reach out to Young Brothers Hardwood.